RESIDENTIAL SUPPORT
Get answers to your questions.
Quick Resources » SmartRG SR500-series DSL Modem
The instructions below apply to SmartRG SR-500 series DSL modems. In order to change your Wi-Fi network name (SSID) and/or password, simply follow the steps below.
-
Using a device that is connected to Wi-Fi or connected directly to your modem, open your browser and type in the following address:
* Note: Ensure to use HTTPS in front of the address.

-
You may be presented with the following security warning. If you are not presented with a security warning, please proceed to step 3.
Clicked the 'Advanced' button.
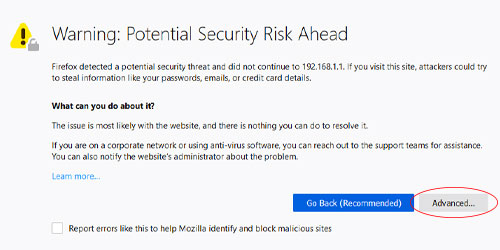
The warning message will expand. Click the 'Accept the Risk and Continue' button.

-
When prompted, enter admin as both the username and the password. Click the 'Apply/Save' button.
-
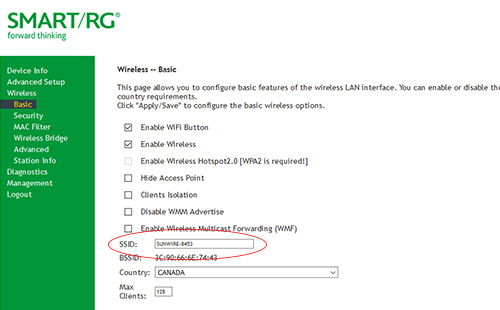
In the left navigation menu, click 'Wireless' to arrive on the 'Basic Wireless' page. Edit the field labelled SSID to change the name of your wireless network. Click the 'Apply' button.
-
Navigate to the 'Security' page under the 'Wireless' menu in the left navigation menu. Use the WPA passphrase field to change your network's password.
* We highly recommend using the 'Click here to display' link in order to double-check and confirm your passcode.

-
Scroll down and click the 'Apply/Save' button. We recommend not changing any other settings.